-
Games
Total materials on the site: 25932View all games 255
-
Genshin Impact
-
Mods
7 with 5 for Genshin Impact
How to Beat the Sineru in Genshin Impact: A Comprehensive Guide to the Boss
In the 2.1 update, Inazuma was expanded with two new islands, another chapter of the storyline, and a new boss - Signora. The first battle with her takes place during the story quest "Palace Duel." After completing it, a new domain opens where you can repeat the fight. This boss is quite challenging, so to make it easier to deal with her, this guide has been prepared. It will tell you how Signora can confront the player, how to deal with her, and what rewards she provides.
Main Boss Information
- Type: Weekly;
- Resin Cost: 30-60 Resin;
- Location: Inazuma, Narukami Island;
- Available Levels: 60-90;
- Fixed Rewards: 300 Mora, Friendship EXP, 300 Adventure EXP;
- Reward Reset Time: 4:00 AM server time.
Important: Each week, you have 3 attempts to obtain rewards from the weekly bosses for only half the required Resin (30 instead of 60). If you need unique drops from Signora, it's worth taking advantage of this opportunity.
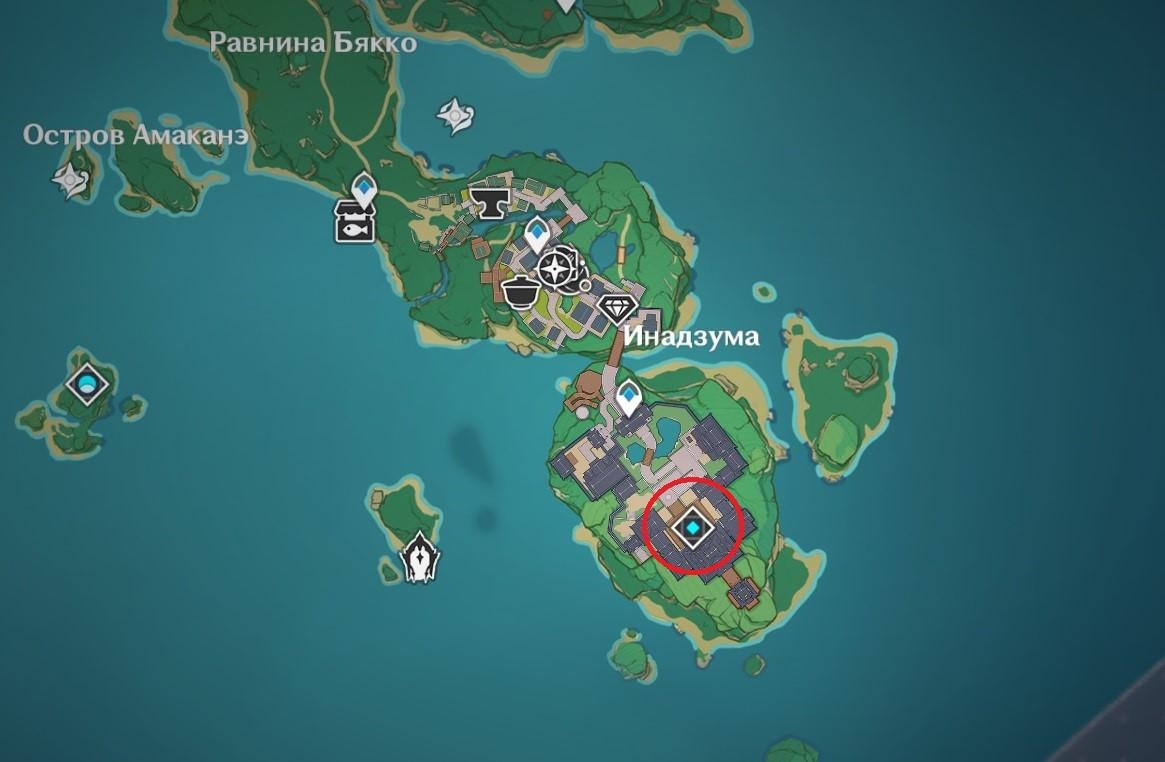
Where to Find Her
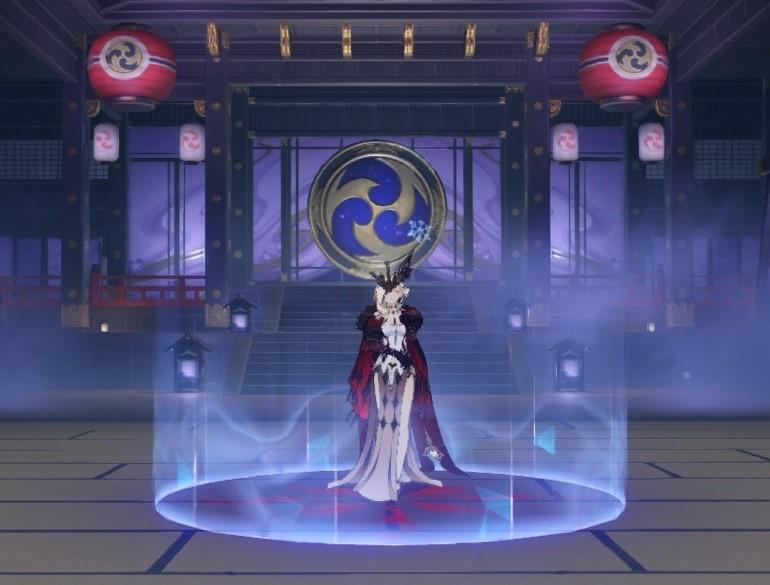
After completing the story quest in the capital of Inazuma, a new teleportation point appears. Unlike the standard teleporters, it is square-shaped and represents a domain, meaning you will be right in front of the entrance.
Special Features
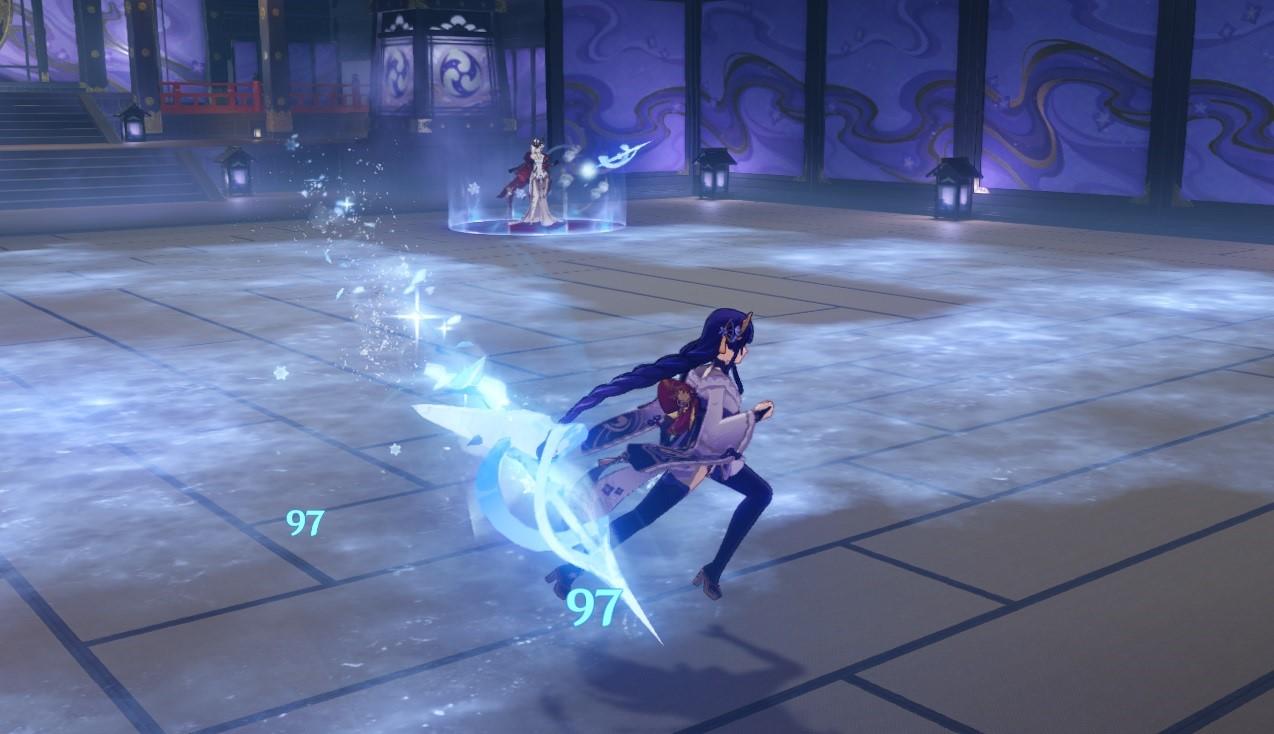
Just like with her colleague, Tartaglia, the battle with Signora consists of multiple phases with different elements. The first phase is Cryo, and the second phase is Pyro, so you need to build your team considering these elements. Signora only uses elemental abilities in both phases.

Strategy for Defeating Signora
The entire battle with her seems quite straightforward: defeat her in the Cryo phase, break her cocoon, and defeat her in the Pyro phase. However, unlike other weekly bosses, the environment will also act against the player.
Negative Effects
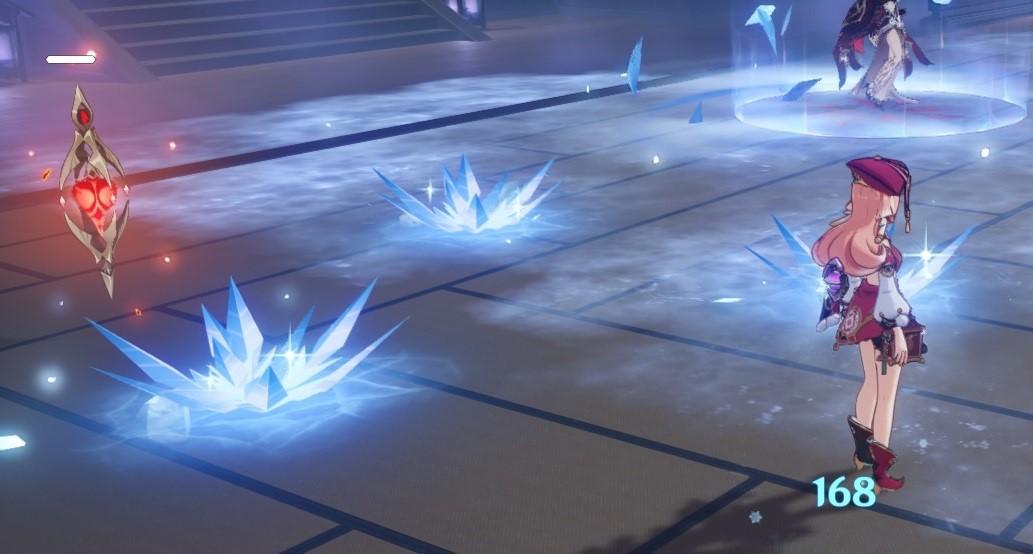
Depending on the boss's phase, a constant debuff will be applied to the character. The effect's intensity gauge is located above the health bar and fills up very quickly - only 10 seconds. The filling speed increases if you are standing on icy or flaming ground. Once it is filled, the character starts losing a significant amount of health per second until the debuff is removed. "Biting Frost" is already familiar to us from Dragonspine, but "Blazing Heat" is a new effect with the same result.
In each corner of the room, there is an artifact - "Heart of Flame" or "Frost-bearing Tree," with an element opposite to the boss's element. It creates an area of warmth or cold, reducing the temperature's impact on the character and clearing a portion of the floor from ice or fire when destroyed (approximately one-quarter of the room). After some time, the artifact will regenerate in its original position, but it's better not to destroy all of them at once.
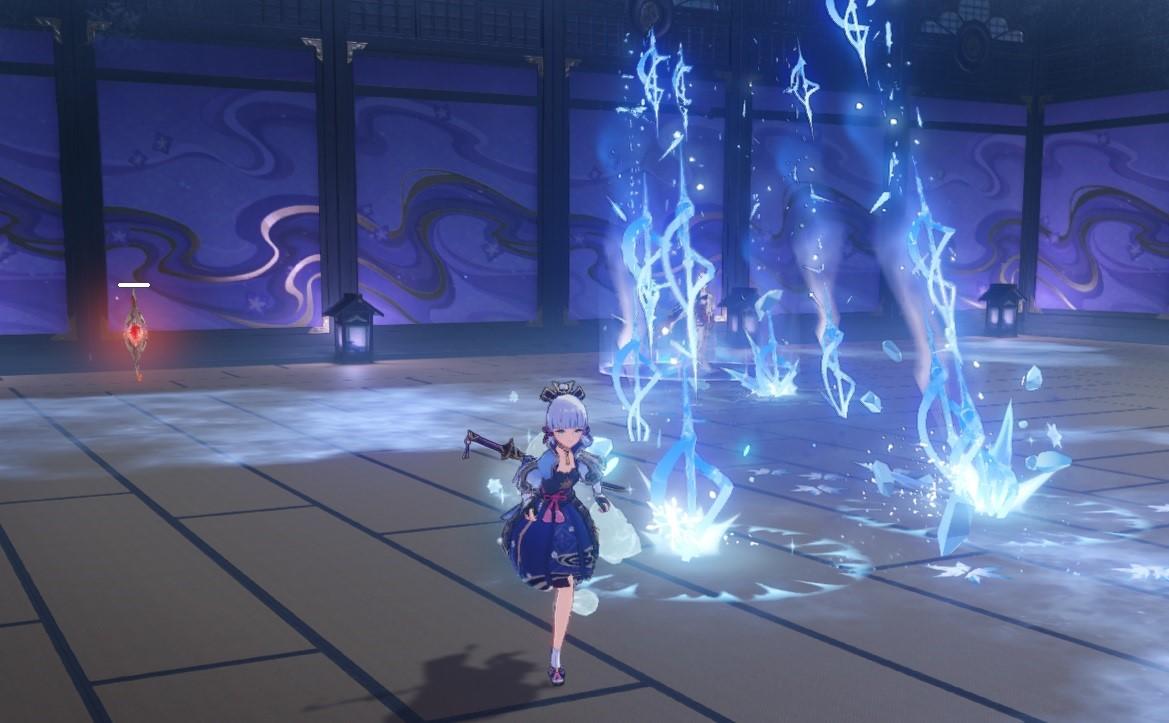
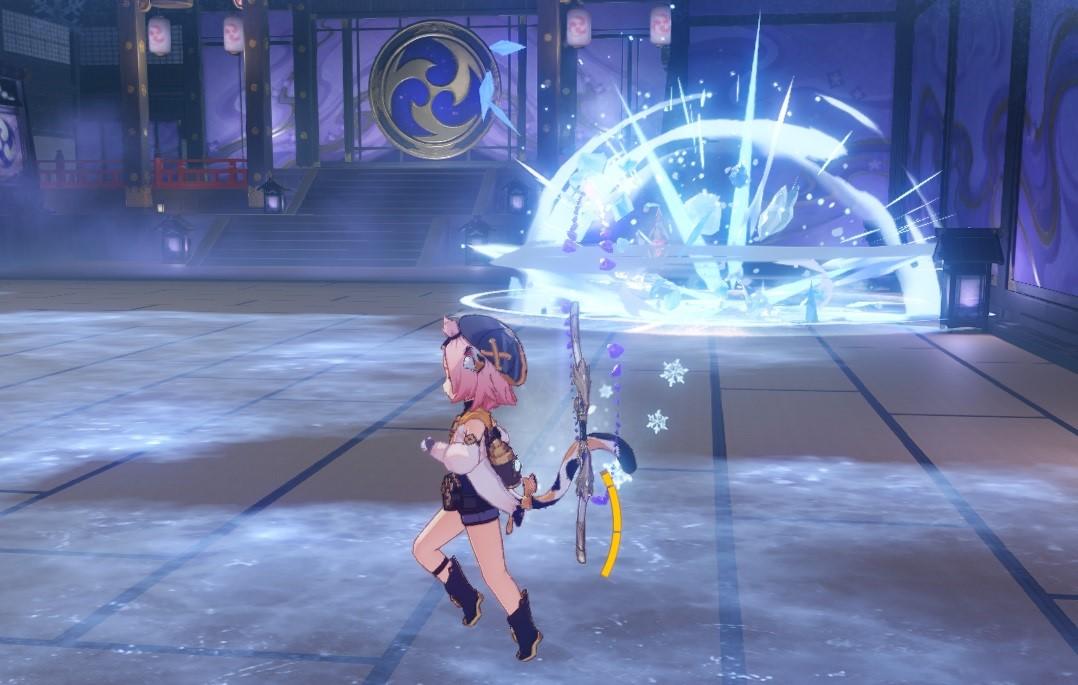
Cryo Cocoon
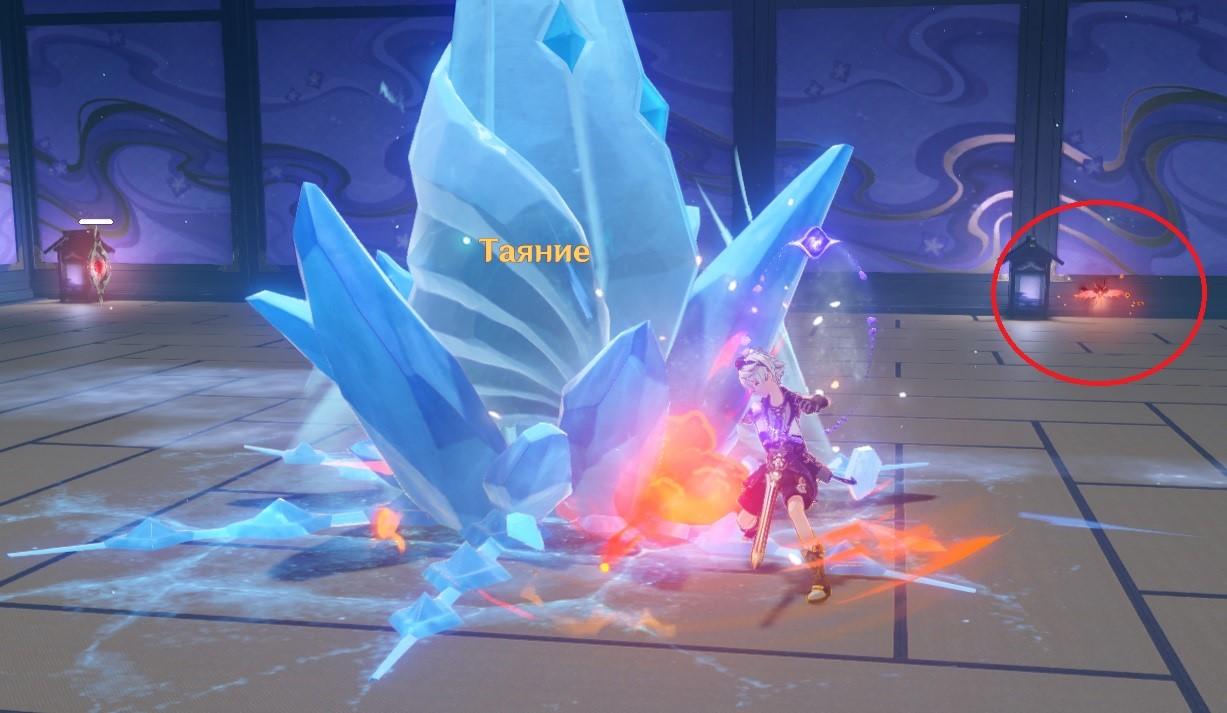
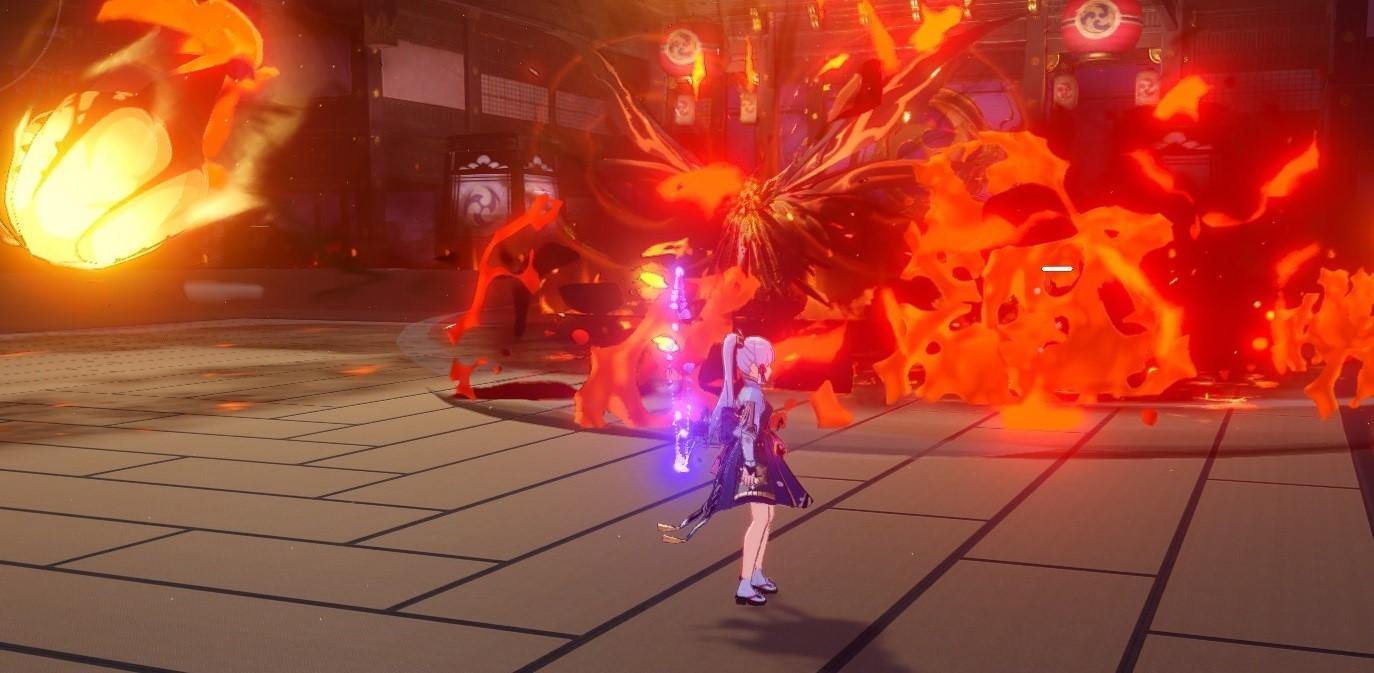
When Signora's health drops to around 20% during the Cryo phase, she surrounds herself with a cryo cocoon but continues to use her abilities. The rate at which Biting Frost accumulates increases significantly during this time. The cocoon can be effectively destroyed by Pyro characters using the Melt reaction, but if you don't have them in your party, pay attention to the fiery motes in the room. Interact with them to gain the Pyro effect for your next attack and break a portion of the cocoon.
Use Supportive Items
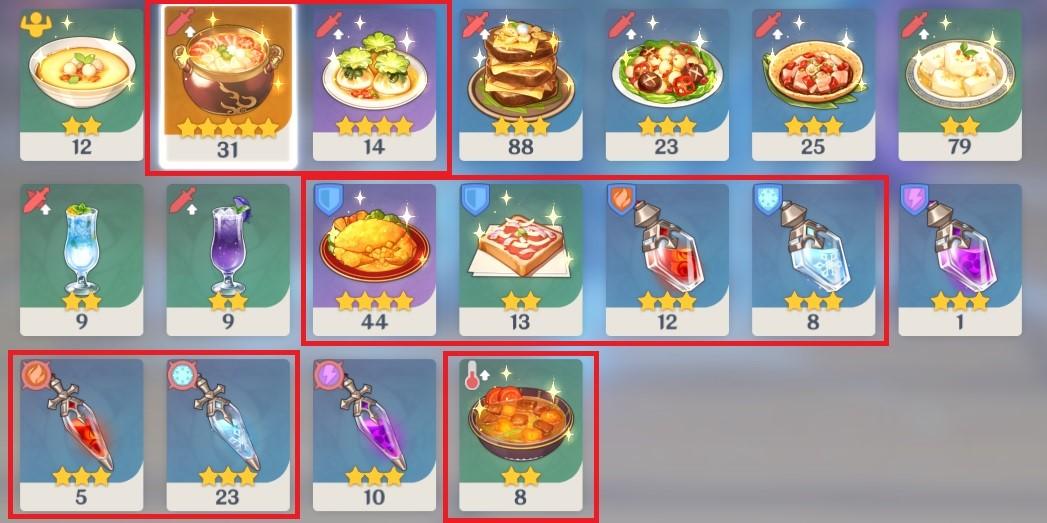
Signora is a boss that is quite challenging due to high elemental damage and constant debuffs. Therefore, it makes sense to use consumable items such as potions, food, and fairy bottles. You will definitely need the following:
- Frost and Heat Shield potions - they increase Cryo/Pyro resistance by 25% and last for 5 minutes for the entire party;
- Flaming and Frosting Essence oils - they increase Cryo/Pyro damage by 25% and last for 5 minutes;
- Reviving food - due to debuffs and damage, there is a high chance that a character with low health may accidentally die during the dungeon run;
- Health-restoring food - it's better to use a 3-star ranked one as its effects are stronger. Pay attention to food that provides instant health restoration rather than periodic healing;
- Stat-boosting items - attack power, critical hit chance, defense, and healing received. The best choices here are "Adept's Temptation" (provides 260-372 attack and 8-12% critical hit chance) and "Golden Crab" (215-308 defense and 6-10% healing effectiveness). The first dish requires rare ingredients, and the recipe may not have been found yet, so you can use "Jade Parcels" (224-320 attack and 6-10% critical hit chance) instead;
- Tomato Stew - especially useful in the Cryo phase as it reduces the rate of Biting Frost accumulation;
- Thermal Bottle - if you don't have the Heart of Flame in the Cryo phase, it will warm up the character and reduce the effect of Biting Frost.
Team Composition
Preparing for the boss fight and considering its mechanics is not enough - you need to determine the team that will enter the domain. There can be 2 options:
- 1 main DPS, 2 additional DPS, 1 support
- 1 main DPS, 1 additional DPS, 2 supports
Choose the option depending on how much damage your main DPS can deal and what element the additional DPS has (without considering their level of refinement, of course).
But the problems don't end there. The team will have to be composed of characters that are available, and they can be either entirely free-to-play or paid. Paid characters offer more variety, but you can still defeat Signora with free characters.
Free Characters
Here's the team composition option:
- Kaeya - main DPS, his Cryo damage will be very effective in the second phase
- Xiangling, Lisa - Pyro and Electro characters who trigger useful reactions and can handle the first phase
- Barbara - support, who will heal the team, definitely necessary.
Paid Characters
There are many more team composition options for paid characters, and it won't be easy to determine the optimal one, but you should start with the characters you have available. Pay special attention to the following characters:
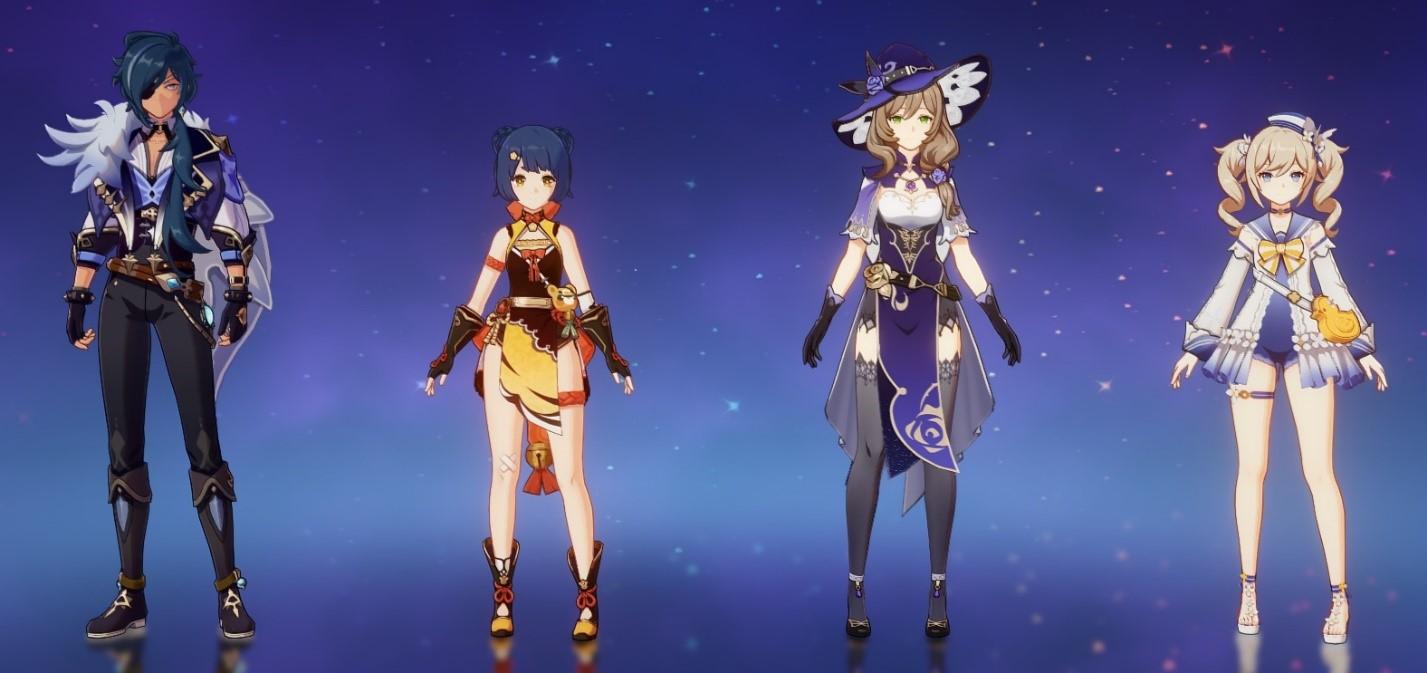
| Zhongli | · Can apply effective shields to the entire team · Reduces physical and elemental damage resistance by 20% while the shield is active |
| Diona | · Applies Cryo shield, very useful in the first phase · Provides AoE periodic healing, Cryo reactions, and can decrease the boss's attack by 15% |
| Bennett | · His elemental skill has very short cooldown, which is useful for breaking the cocoon in the Cryo phase · Elemental Burst heals all allies and provides a massive attack bonus |
| Raiden | · Provides constant additional Electro damage to allies · Restores energy to allies during the activation of her Elemental Burst · Deals high Electro damage |
| Ayaka | · Deals massive Cryo damage with normal attacks · Elemental Burst deals continuous high damage over time · Can move quickly around the room with her alternative sprint |
| Ganyu |
|
| Rosaria | · Increases the critical hit chance of allies when activating her Elemental Burst · Elemental Burst deals continuous AoE Cryo damage · Provides additional mobility · High attack speed allows for efficient destruction of elemental artifacts |
| Tartaglia |
|
Elemental Reactions - Key to Success
For Signora, there are only two elements - Cryo and Pyro. Therefore, Pyro is effective against Cryo, and Cryo can extinguish Pyro. The reaction between them is Melt, which provides bonus damage: - 200% if Pyro is applied to Cryo; - 150% if Cryo is applied to Pyro. Another useful element is Electro. Interaction with Cryo triggers the Superconduct reaction, which reduces physical resistance by 40% and deals area Cryo damage (it can also be activated in the second phase). Contact with Pyro triggers Overload, causing an area explosion with Pyro damage.
It's also worth considering using Hydro, which triggers Vaporize. This reaction adds 200% damage if Hydro damage is applied to Pyro, making characters with this element very effective against Signora.
The last useful element is Geo. It only triggers one elemental reaction - Crystallize, which creates shield shards on the field. Shields will definitely be useful during the battle against this boss.
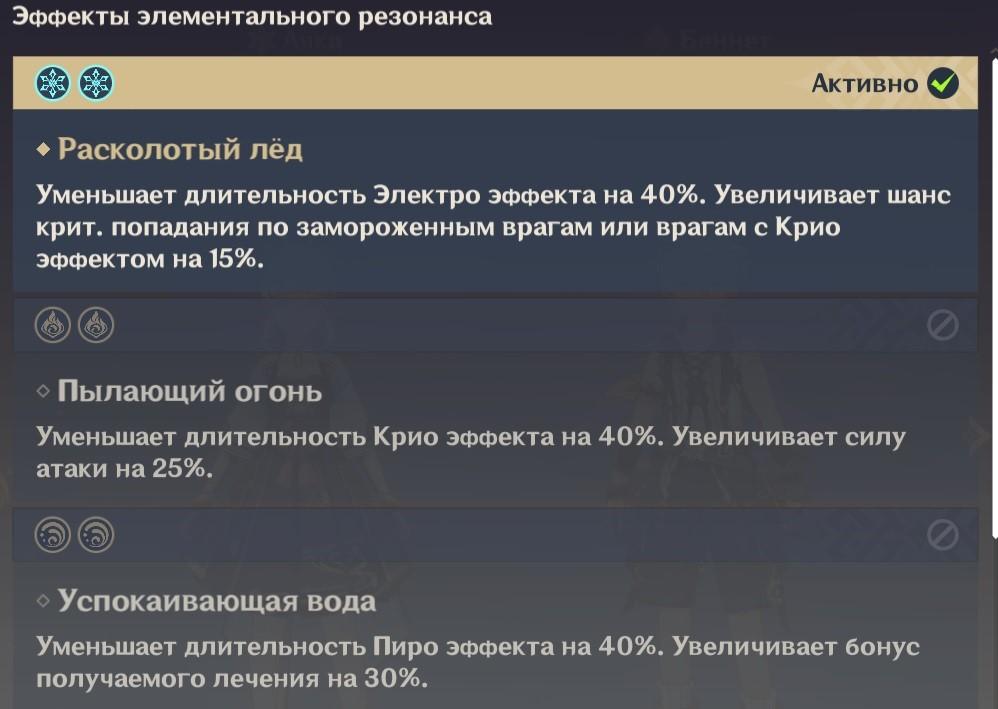
In an ideal team composition for Signora, you should have characters with Cryo and Pyro damage and can include two of each (to benefit from elemental resonance bonuses), or add Hydro, Electro, or Geo for more diverse and effective reactions.
Signora's Abilities
Her set of abilities depends on the current phase, but in both phases, she can move around the room - you can track her movement trajectory by the moving dark trail on the floor. Also, all of her abilities leave a negative effect - Frost Floor or Ashen Ground, which apply the corresponding element to the character and accelerate the accumulation of Frost or Heat.
Phase 1 (Cryo)
1. Frost Rain
Signora aims and releases a rain of ice shards into the selected area. It falls with a slight delay, so it's relatively easy to dodge if you don't stay in one place.
2. Pursuing Ice Lance
She prepares this skill in advance - for a few seconds, Signora prepares ice lances (5 pieces, visible behind her back), which then follow the active character. It's more challenging to prevent this attack, but you can avoid damage by dashing right before the moment of collision.
3. Swirling Snowflake
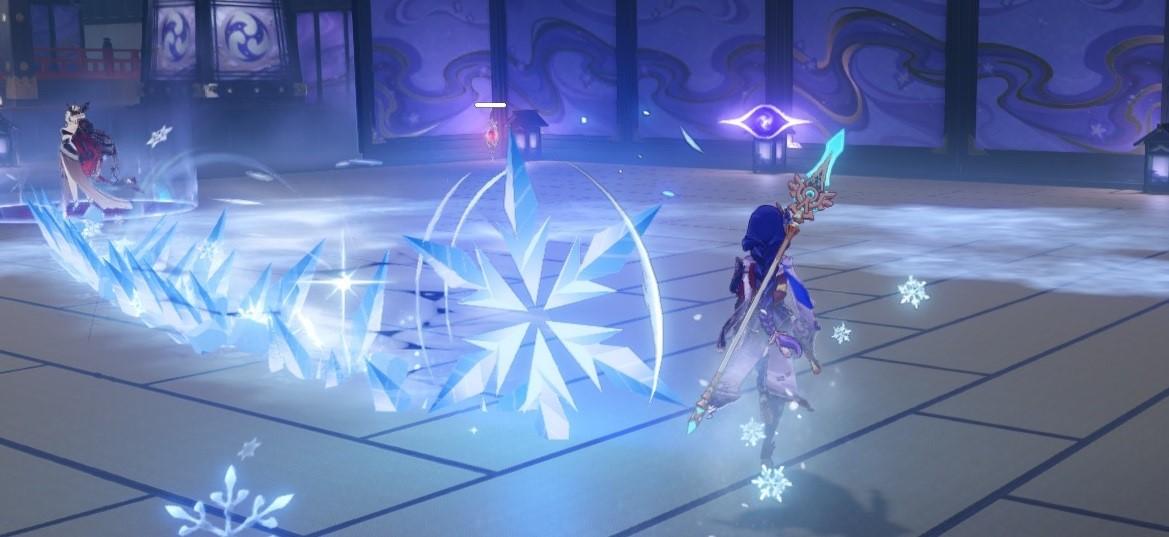
Signora releases a rapidly rolling snowflake that leaves an icy trail behind. The snowflake's trajectory is curved, so it may not collide with the character if you move aside in time.
4. Icy Spikes
Signora throws a massive ice spear at the hero, which embeds into the ground and leaves icy spikes that periodically deal Cryo damage and then explode. This skill is most similar to Rosaria's elemental burst. If you have Diona in your party, her shield is effective in absorbing Cryo damage.
5. Exploding Ice Flowers
Three icy flower traps appear near the character, which deal minor Cryo damage if stepped on. Unlike Signora's other abilities, it's easier to dodge these traps.
6. Ice Cocoon
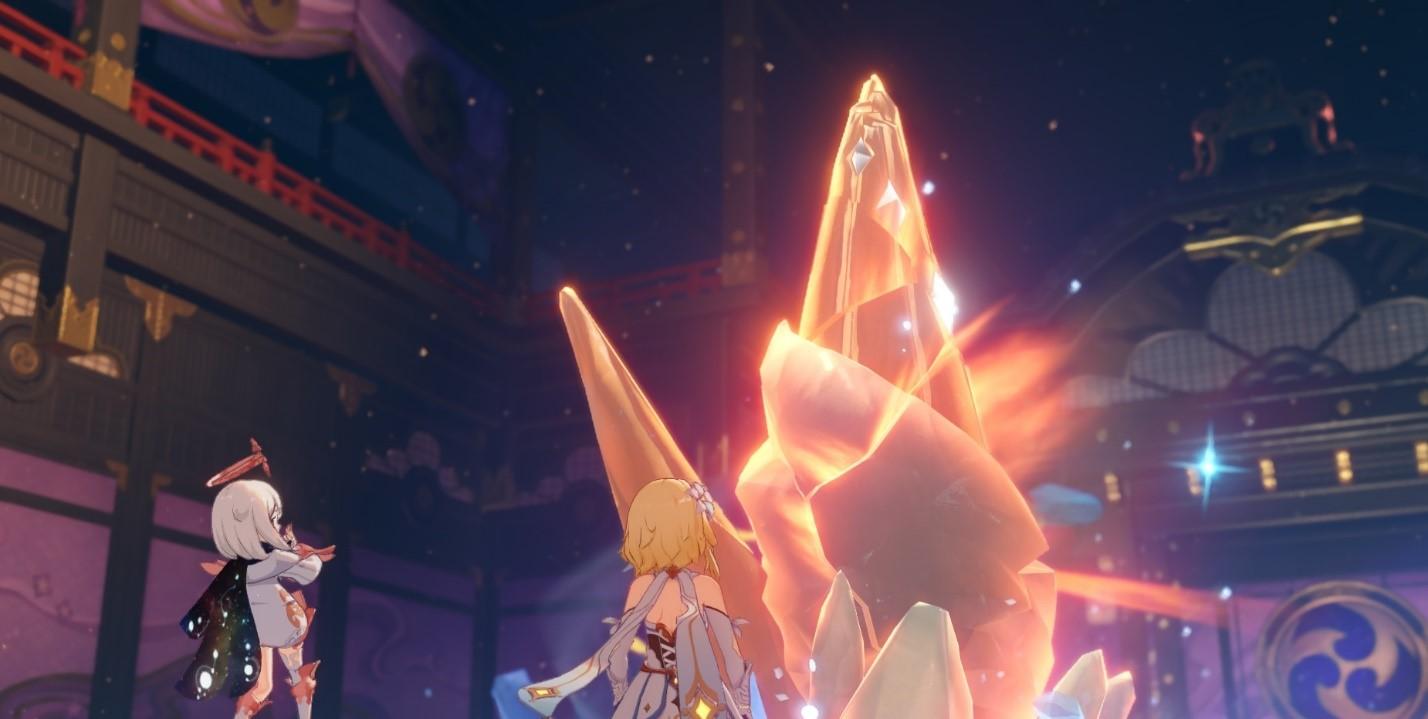
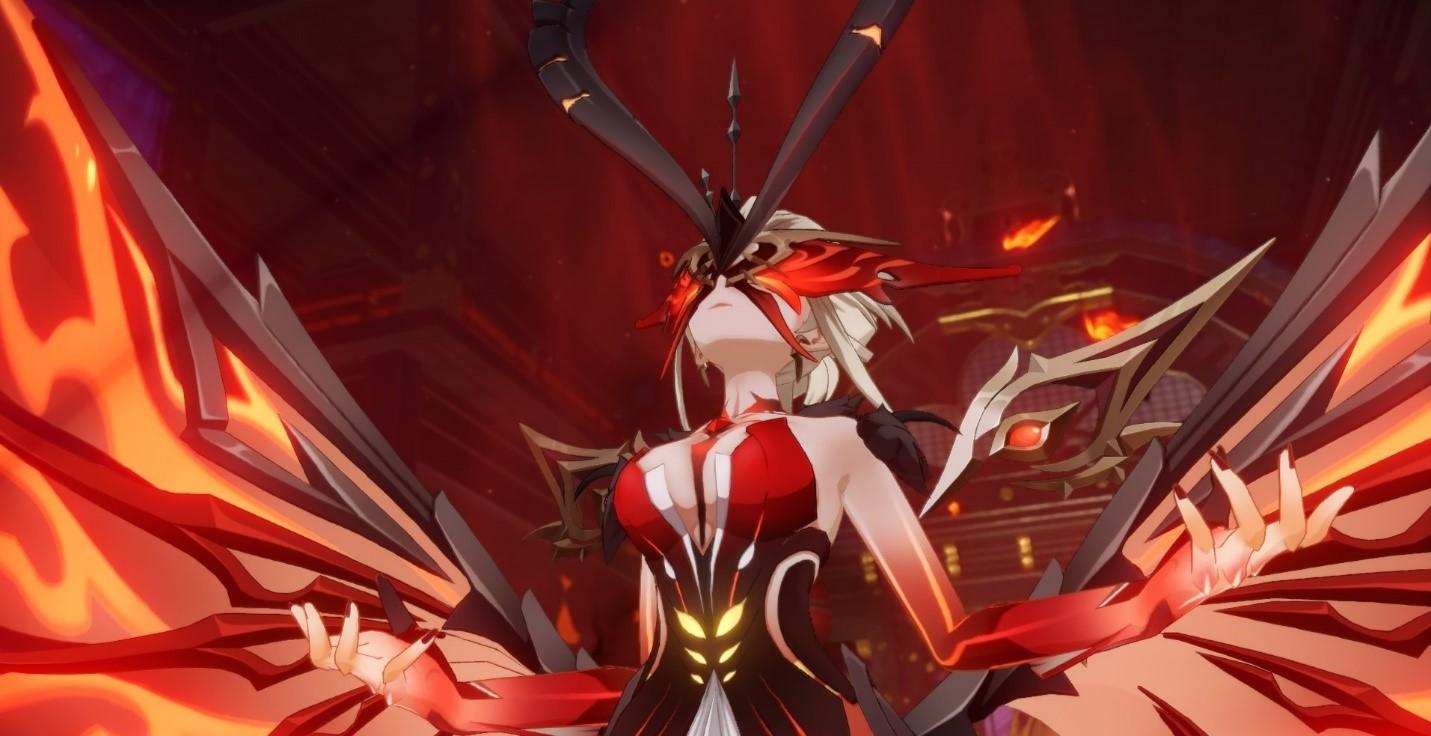
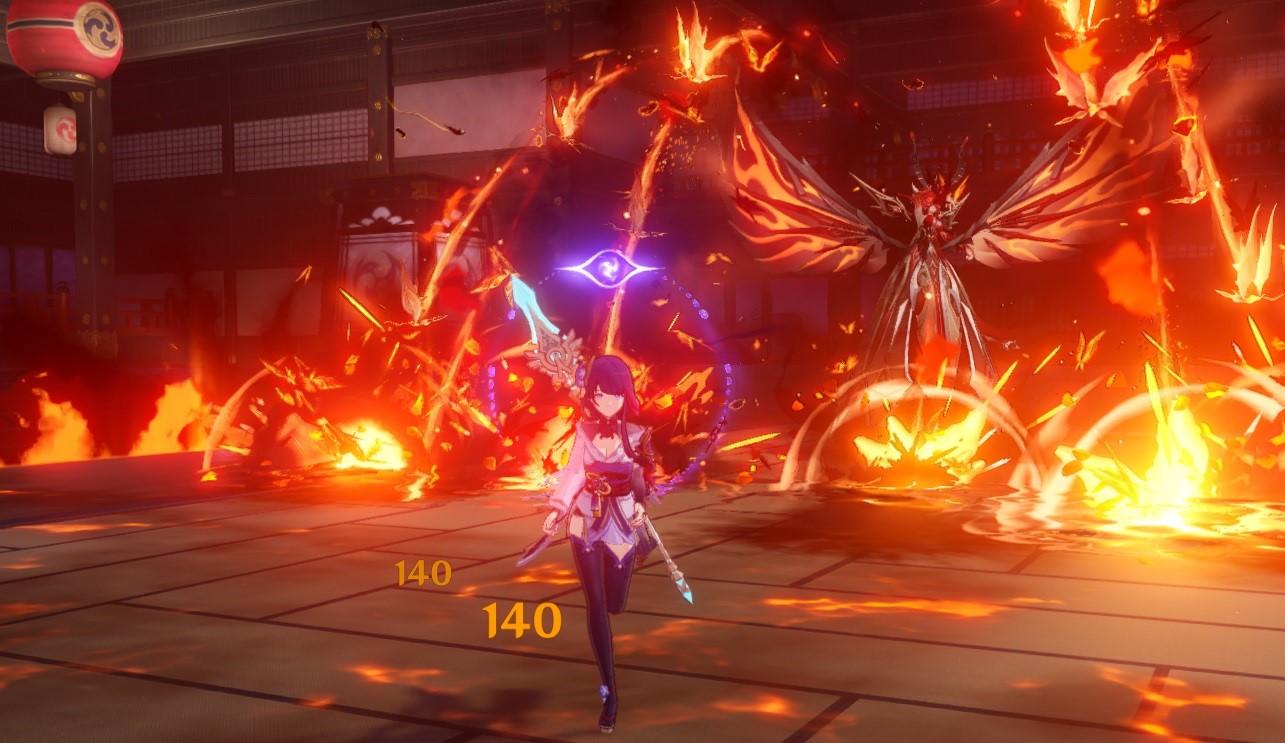
The final ability of Signora indicates that her health has dropped critically low. It significantly cools the air in the room and creates a Cryo armor that needs to be destroyed as quickly as possible because you will constantly receive Cryo damage from the cold. Use Pyro characters and torches that provide the Pyro effect for the next attack. When the cocoon is destroyed, a cutscene starts, and the second phase of the battle begins.
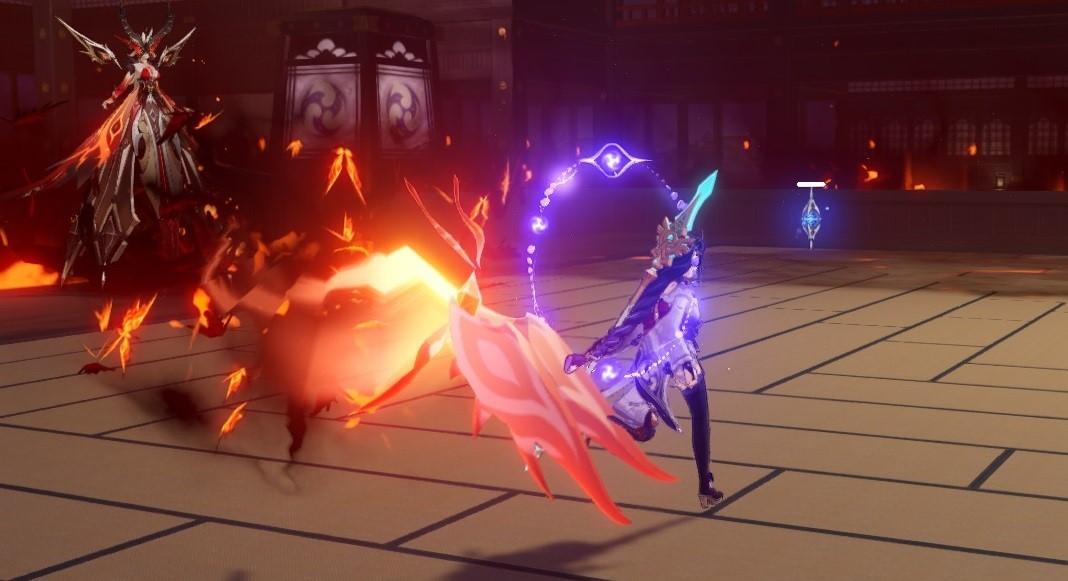
Phase 2 (Pyro)
1. Pursuing Firefly
Similar to the snowflake in the Cryo phase, Signora releases a firefly that pursues the character. You can escape from it or use a shield to reduce its damage.
2. Rain of Fire
Signora stands still and spreads her wings, causing a rain of fire and meteors that deal area damage and explode. This ability has a very large radius, and it's quite challenging to dodge. Be prepared to destroy the Frost Orb to clear the field and continue the battle.
3. Fiery Whip
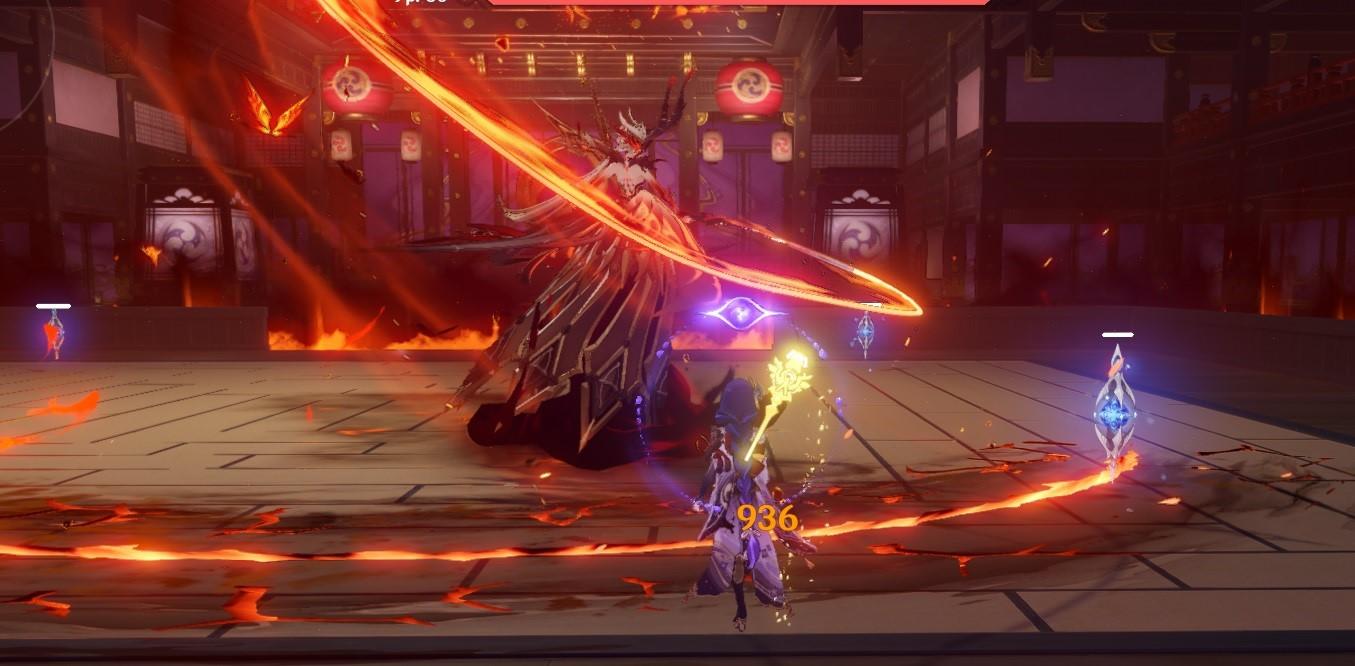
Signora swings a fiery whip and strikes the hero, dealing Pyro damage, and then creates two additional lashes that ignite the ground in front of her.
4. Dark Fire
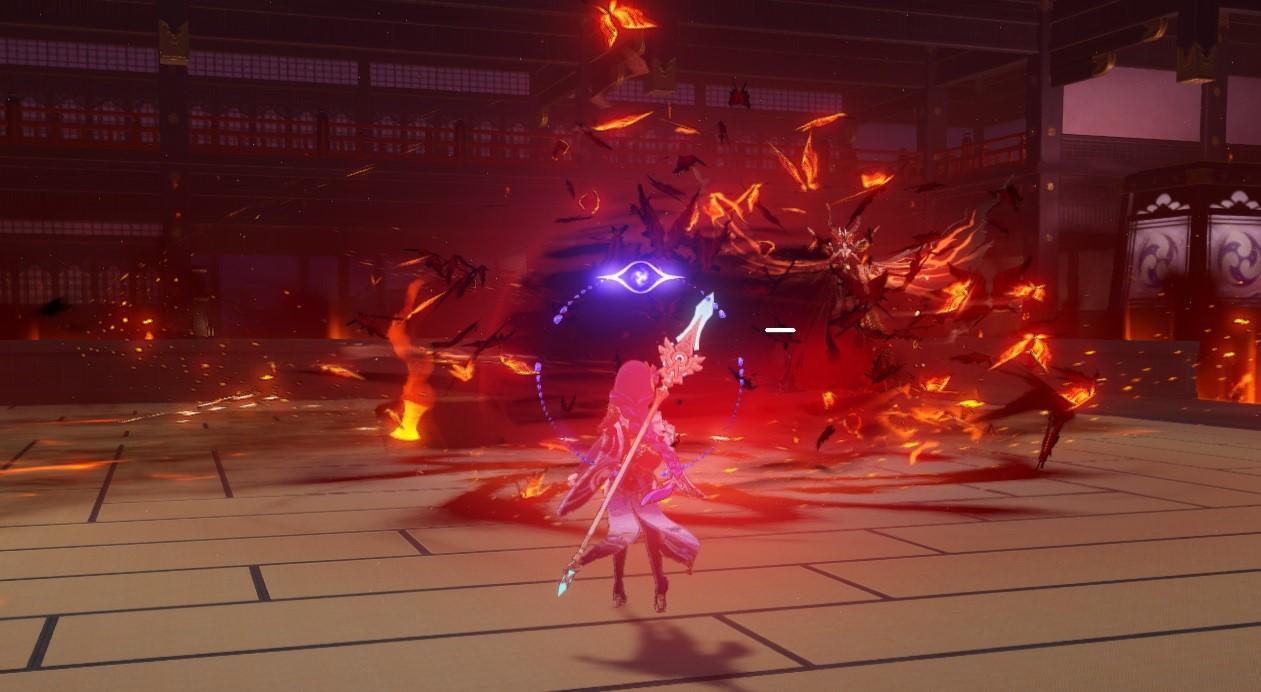
A huge ball of dark flames and butterflies begins to chase the character, capable of crossing the entire room.
5. Firestorm
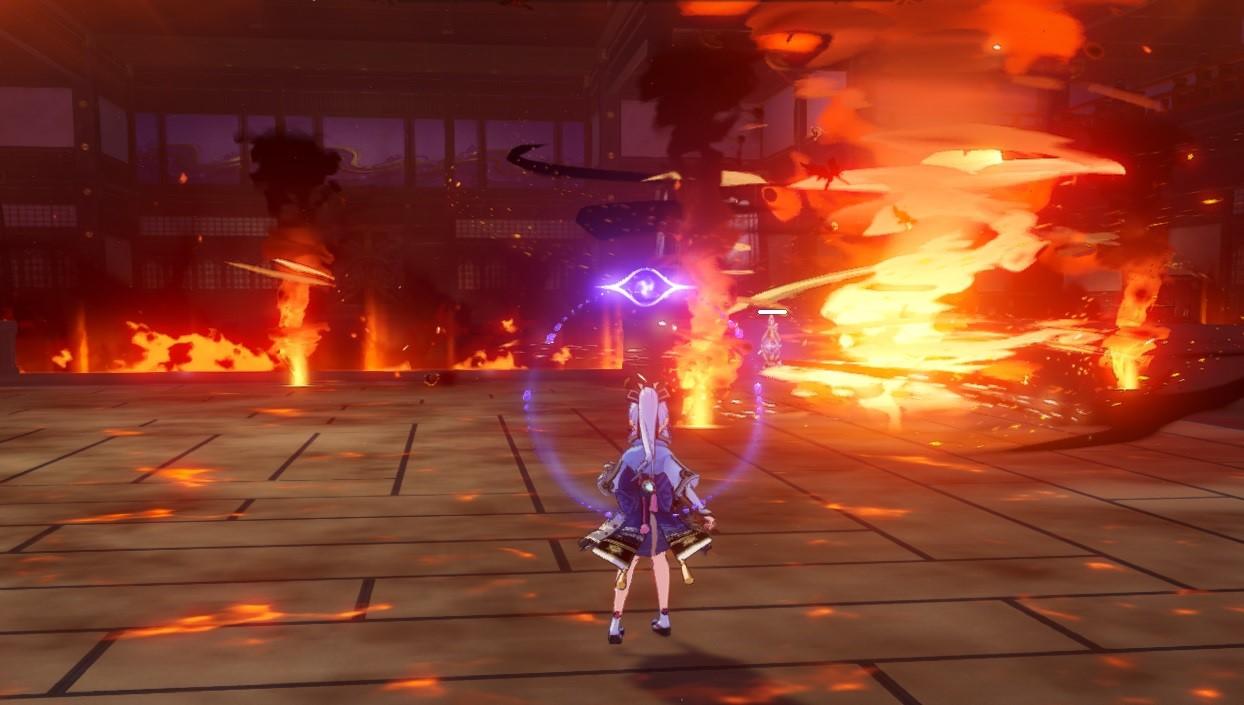
Signora disappears from the map, and instead, fiery whirlwinds start moving around the room, igniting the ground and dealing damage upon contact with the character. By constantly moving, you can avoid them, and the duration of the ability is approximately 10 seconds.
6. Swarm of Fireflies
This ability is very similar to Rain of Fire, but its radius is half the size. Instead of meteors, Signora unleashes a large number of fiery fireflies that explode upon contact with the character. It's much easier to dodge this ability.
Boss Rewards
You can receive the rewards for defeating Signora only once a week, and they include useful items for character and talent development, as well as artifacts and Northlander weapon prototypes. It's a standard reward for a weekly boss.
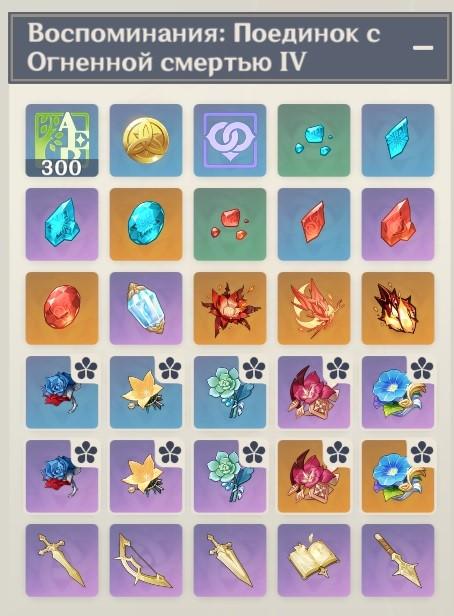
After collecting the rewards, the domain will be considered completed.
Genshin Impact: How to Take the "Meeting with Noelle" Screenshot
- 21158
- 0
- 17 mar 2021
Comments 0
Rules for writing comments. For non-compliance - ban!
- Use of profanity (mat) in messages
- Communication is not on the topic of the material
- Any insults of other participants, including the author of the material
- Writing messages in whole or in part in CAPITAL letters (Caps Lock)
- Expressing your opinion without supporting it with arguments
- The use of links to third-party sites, or the use of images/videos/other content containing the aforementioned links
Messages that violate these rules will be deleted, and malicious violators - deprived of the ability to add comments on the site!